|

This tutorial is by Natália Raposo, whom I thank
for letting me translate her tutorials.
*
Original here
*
Tubes

*
Material

*
Plugins
Contours/ Croisillons
Contours/ Effet Pointilliste
Contours/ Noir/ Blanc
You can find these plugins on the websites of:
Renée
Cloclo
SCRIPT
1.
Place the selection in the Selections folder of the PSP
Open the mask on the psp and minimize
Choose two colors of your tube, a dark one for the foreground and a
light one for the background
2.
Open a new transparent image with 1000x600px
Prepare this radial gradient
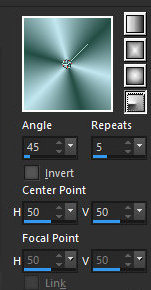
Paint the image with it
3.
Effects / Edge Effects / Enhance More
Effects / Reflection Effects / Kaleidoscope
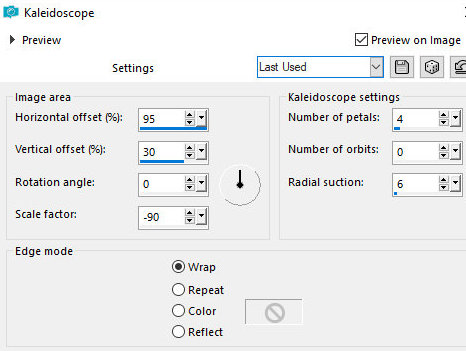
Effects / Edge Effects / Enhance
4.
Effects / Plugins / Contours / Croisillons

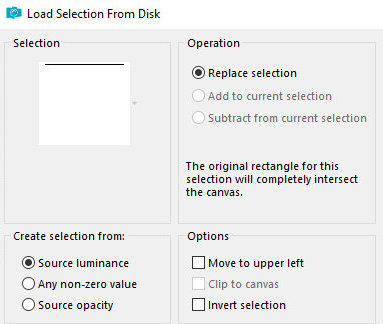
Selections / Load selection from disk / selection
[selection-woodland]
Selections / Promote selection to layer
5.
Effects / plugins / contours / Effet pointilliste

Copy the misted landscape tube and paste it into
the selection
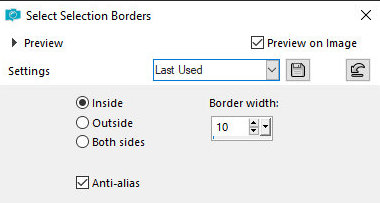
Selections / Modify / Select Selection Borders
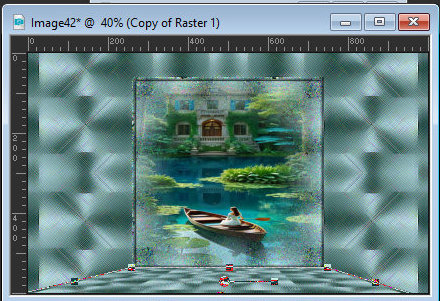
6.
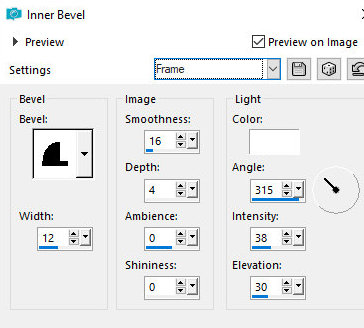
Effects / 3D Effects / Inner Bevel - Preset [Frame] (if you don't
have it, just set it according to the print)
Activate the Raster 1 layer
Layers / duplicate
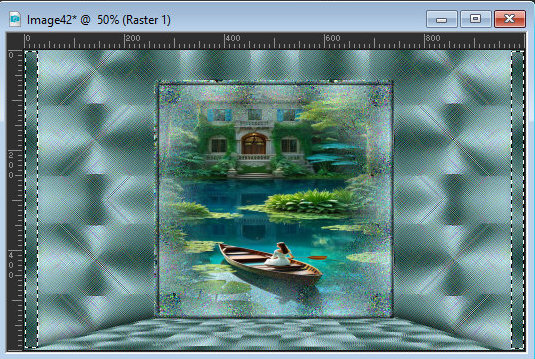
7.
Activate the Pick tool / Set the Mode option = free
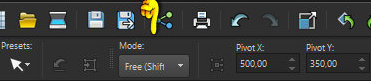
Now move the image, dragging the nodes on the left
and right and position it in the image as shown in the print
Drop shadow: 0 0 100 50
8.
Activate the Raster 1 layer
Activate the Selection Tool / Set it to Rectangle and Add Shift and
draw a rectangle as shown in the print. Do this on both sides
Selections / Promote selection to layer
9.
Select none
Drop Shadow same as above
Add new layer
10.
Paint with one of the selected colors
Layers / New Mask Layer / From Image / Mask [creation.tine_masque334]
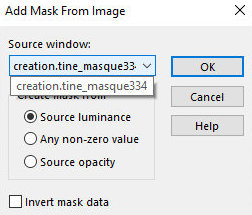
Merge Group
11.
Effects / Edge Effects / Enhance
Activate the top layer
Copy the tube character and paste it as a new layer
12.
Make the necessary adjustments according to your image (resize/Drop
shadow/ Position/ Sharpen)
Image / Add borders / 1px / black
Selections / Select All
13.
Image / Add borders / 50px / white
Selections / Invert
Paint the selection with the gradient
14.
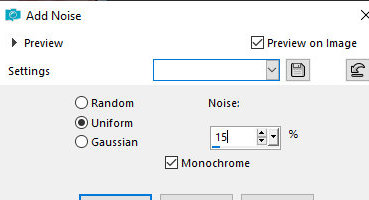
Effects / Plugins / Contours / Noir/Blanc
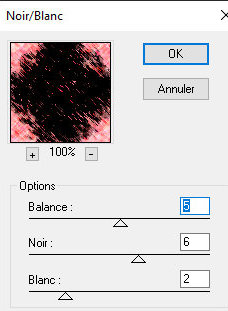
Adjust / Add/Remove Noise / Add Noise
Effects / 3D Effects / Inner Bevel - same as above
Select none
Image / Resize: width=1000px - all layers checked
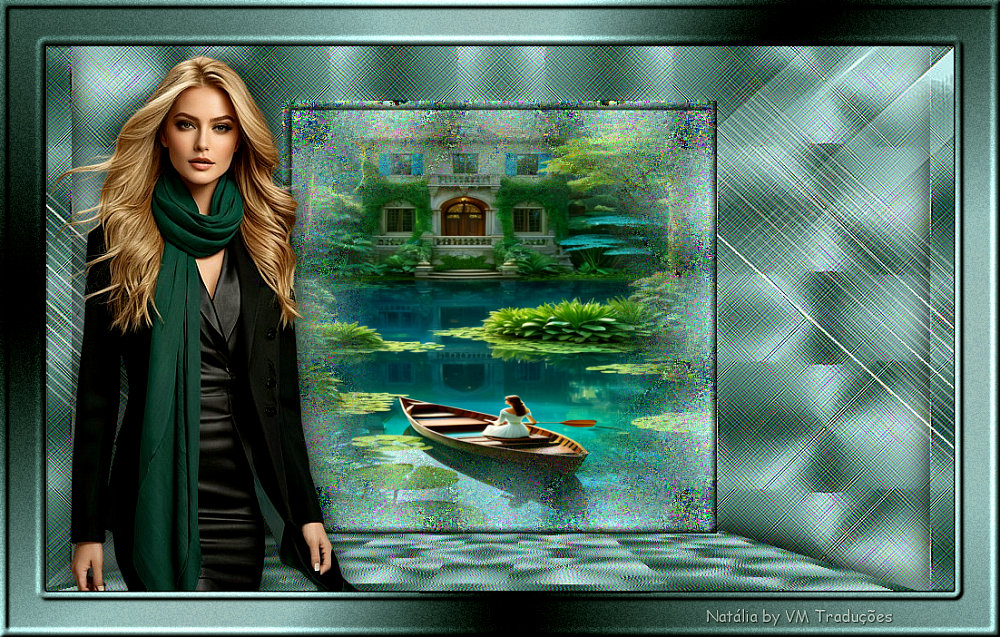
15.
Put the signatures
Merge All
Save as jpeg
*
Tutorial traduzido em
29/07/2024
*
 |