|

This tutorial is from Angela das
Graças to whom I thank you for letting me translate your tutorials.
*
Original here
*
Tubes

*
Material

*
Plugins
Textures / Vitral
Textures / Grain
Impressionist
SCRIPT
1.
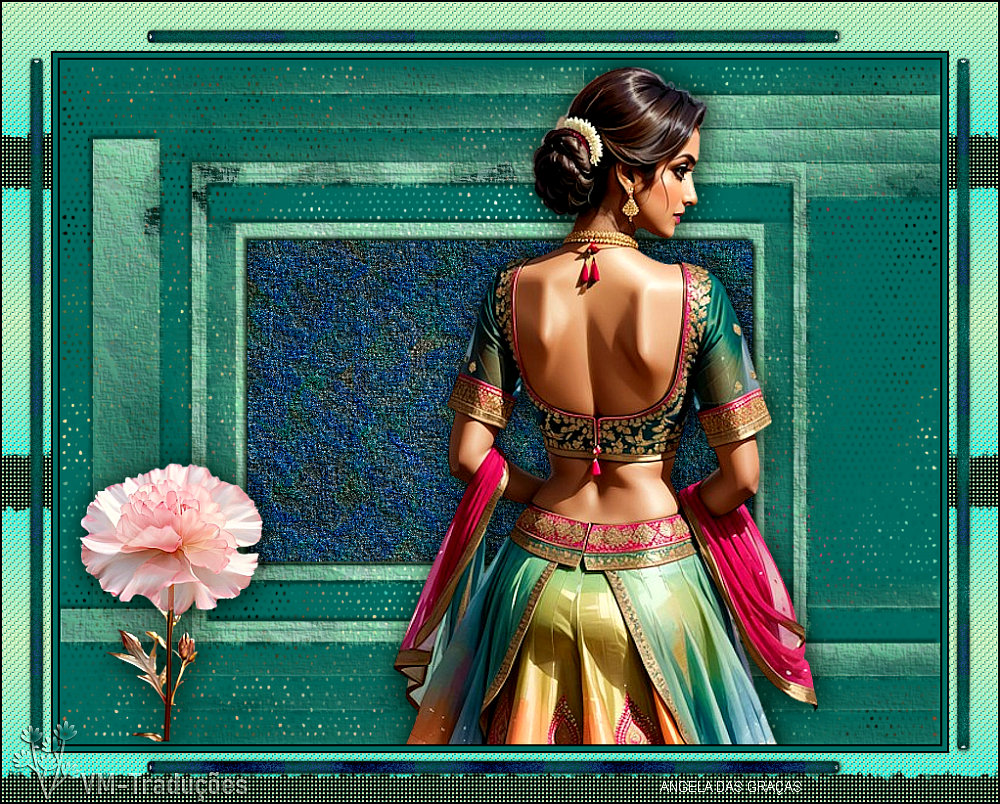
Open the material in PSP / Duplique (Shift+D) / Close the Originals
Choose two colors from your tubes: a dark color for the foreground
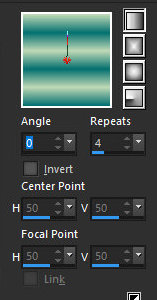
Prepare a linear gradient
2.
Open a new transparent image with 900 x 700px
Paint with the gradient
Selections / Select All
3.
Copy the character tube and paste it in the selection
Select none
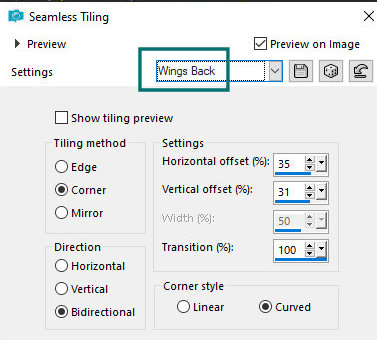
Effects / Image Effects / Seamless Tiling - Preset [Wings Back]
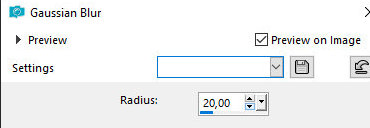
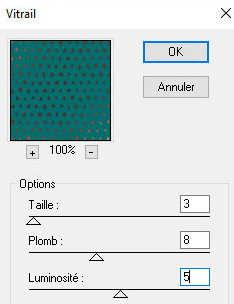
4.
Adjust / Blur / Gaussian Blur = 20
Effects / Plugins / Textures / Vitrail - Apply 3 times
Copy the image and paste it as a new image (we will use it later)
5.
Return to your work
Add a new layer
Paint with the light color
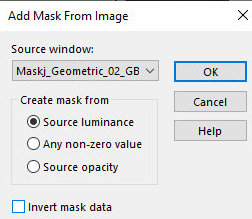
6.
Layers / New mask layer / From Image / Mask [
[MASKJ_GEOMETRIC_02_GB_20196]
Merge Group
Drop Shadow: 4 4 60 4 Black
7.
Layers / Properties / Opatity = 70%
Add Nova Layer
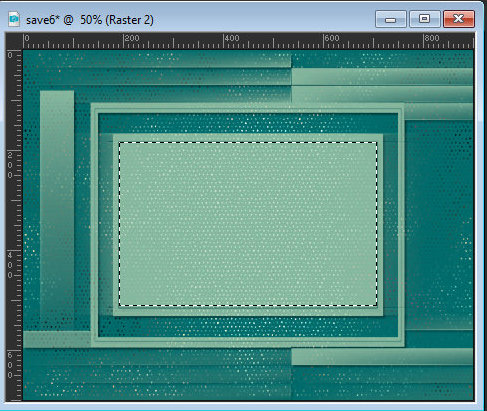
Ative a Selection Tool(selection
type-rectangle)
Select the center of Mask with the Selection Tool according to Print
8.
Copy the image reserved above and paste it in the selection
Keep the selection
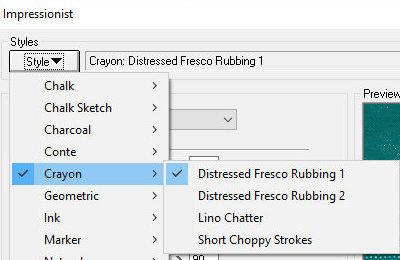
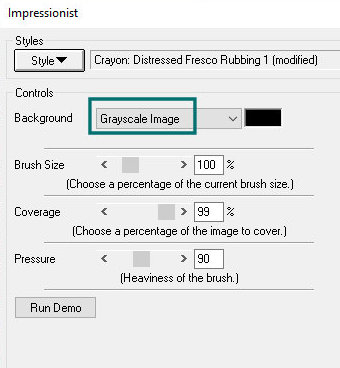
Effects / Plugins / Impressionist
9.
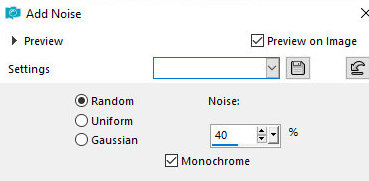
Adjust / Add / Remove Noise / Add Noise
Drop Shadow: 4 4 60 4 Black
Repeat with negative v and h
10.
Select none
Activate the mask layer
Effects / Plugins / Impressionist
11.
Drop Shadow: 4 4 60 4 Black
Copy the character tube and paste it like a new layer
Layers / Arrange / Bring to top
resize if necessary
Drop Shadow of your choice
12.
Image / add borders / 2px / black
Image / add borders / 5px / dark color
Image / add borders / 2px / black
Image / add borders / 50px / white
13.
Select this 50px edge with Magic Wand (Tolerance/Feather = 0)
Paint with the gradient
Effects / Plugins / Texture / Grain

14.
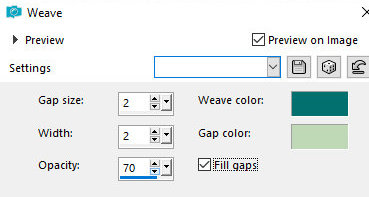
Effects / Texture Effects / Weave (Colors: Fore / Back)
Select none
Copy Tube Deco [Angelagmn_deco20] and paste as Nova Layer
15.
Color according to your colors
Copy the floral tube and paste it like a new layer
Drop Shadow of your choice
16.
Image / add borders / 2px / black
Put your signature
Merge all
Save as JPEG
*
If you make my translation, I will be very happy if:
> You warn me if you find any errors
> Send a copy of your version to my email *
> If when sharing you mention that you used my translation, thus
valuing my work
*My email - veramendespsp2@gmail.com
Tutorial traduzido em 21/05/24
*
 |