|

This tutorial is from Natalia
Raposo to whom I thank you for letting me translate your tutorials.
*
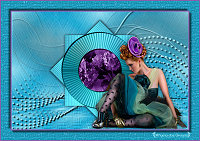
Original here
*
Tubes

*
Material

*
Plugins
VM Toolbox/ Tiler
Medhi/ Sorting Tiles
Flaming Pear/ Flexify 2
Simple/ Left Right Wrap
Caroline and Sensibility/ CS-DLines
[AFS IMPORT]/ sqborder2
Graphics Plus/ Cross Shadow
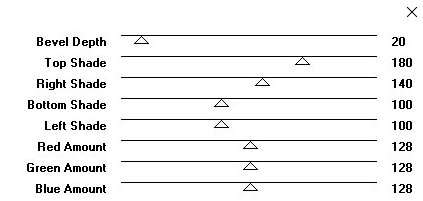
Graphics Plus/ Button Beveler III
SCRIPT
1.
Open the material in PSP / Duplick (Shift+D) / Close the Originals
Choose two colors of your tubes: a dark color for the foreground and
a light color for the background
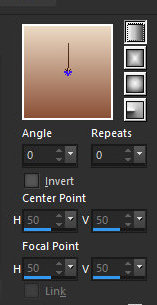
Prepare a linear gradient
2.
Open a new transparent image with 1000 x 600px
Paint with the gradient
Selections / Select All
3.
Copy the character tube and paste it in the selection
Select none
Effects / Image Effects / Seamless Tiling / Default

4.
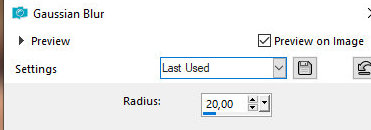
Adjust / Blur / Gaussian Blur = 20
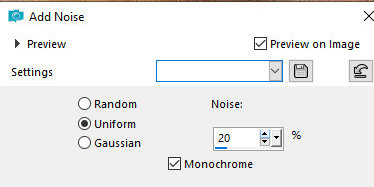
Adjust / Add / Remove Noise / Add Noise
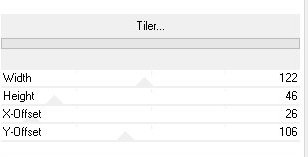
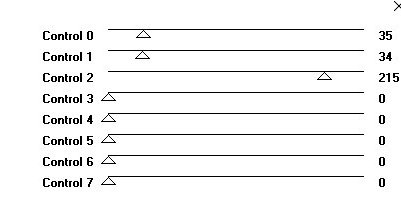
Effects / Plugins / Unlimited 2 / VM Toolbox / Tiler
5.
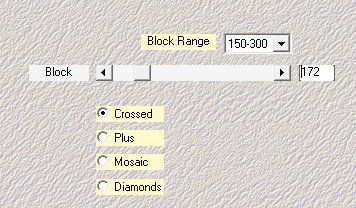
Effects / Plugins / Mehdi / Sorting Tiles
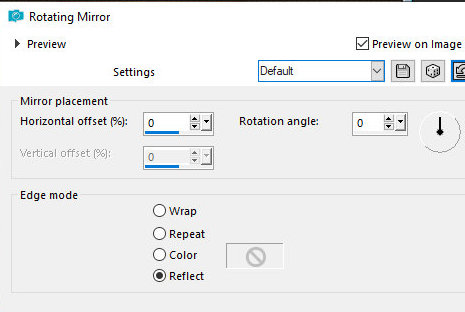
Effects / Reflection Effects / Rotating Mirror - Default
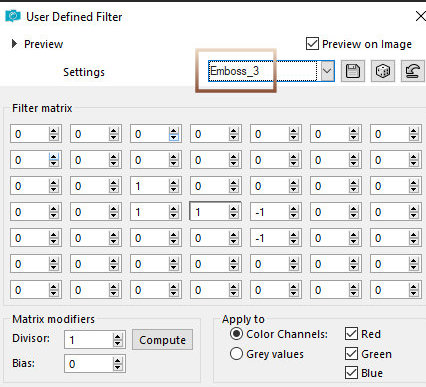
Effects / User Defined Filter / Emboss 3
6.
Layers / Duplicate
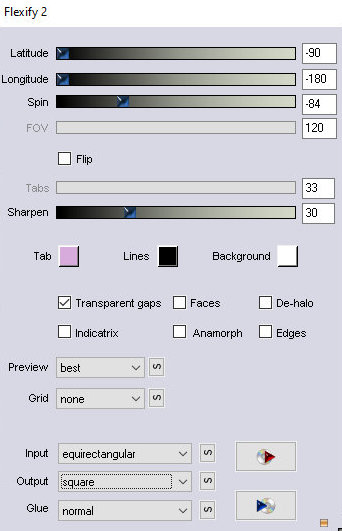
Effects / Plugins / Flaming Pear / Flexify 2
Effects / Plugins / Simple / Left Right Wrap
7.
Effects / Plugins / Flaming Pear / Flexify 2
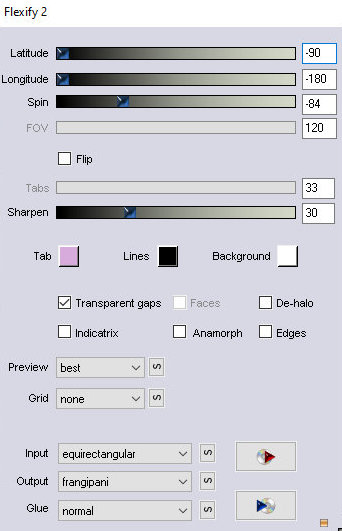
N.T.: Have patience when looking for this preset (fringipani)
in flexify2 as it is at the end of the preset list.
Image / Resize: 80% - All Layers Unmarked
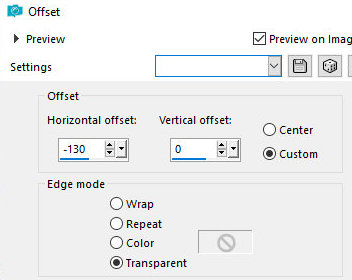
Effects / Image Effects / Offset
8.
Layers / Duplicate
Image / Mirror / Horizontal Mirror
Merge Down
9.
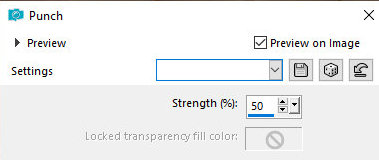
Effects / Detortion Effects / Punch / 50
Effects / Plugins / Carolaine and Sensibility / CS_DLINES
Drop Shadow: 0 0 100 30 Black
10.
Add Nova Layer
Layers / arrange / move down
White color
11.
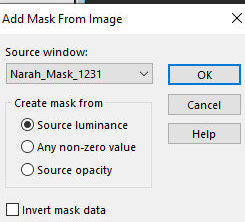
Layers / New Mask Layer / From Image / Mask [Narah_Mask_1231]
Merge Group
Layers / Properties / Blend Mode: Luminance (L) / Opacity = 55%
12.
Activate Layer Raster 1
Effects / Plugins / AFS Import / SQBORDER 2

Copy the tube personagem and paste it like a new layer
13.
Layers / arrange / bring to top
Position how to prefer
Resize if necessary
14.
Drop Shadow of your choice
Image / add borders / 2px / white
Copy (will be in memory)
15.
Selections / Select All
Image / ad borders / 50px / white
Selections / Invert
16.
Paste in the selection the image that is in memory
Adjust / Blur / Gaussian Blur = 20

Effects / Plugins / Graphic Plus / Cross Shadow
17.
Effects / Plugins / AFS IMPORT / SQBORDER2
Effects / Plugins / Graphic Plus / Button Beveler III
Selections / Invert
18.
Drop Shadow: 0 0 100 30 Black
Select none
Image / add borders / 2px / white
19.
Image / resize: width = 1000px - all layers marked
Adjust / Sharpness / Sharpen
Copy Tube Deco [nrb_art_deco_76] and paste it as new layer
20.
Copy Tube Deco [nrb_art_deco_77] and paste as new layer
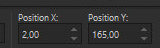
Activate Pick Tool and configure: x = 2 / y = 165
Layers / Duplicate
21.
Image / Mirror / Horizontal Mirror
Copy the tube text and paste it as new layer
Position how to prefer
22.
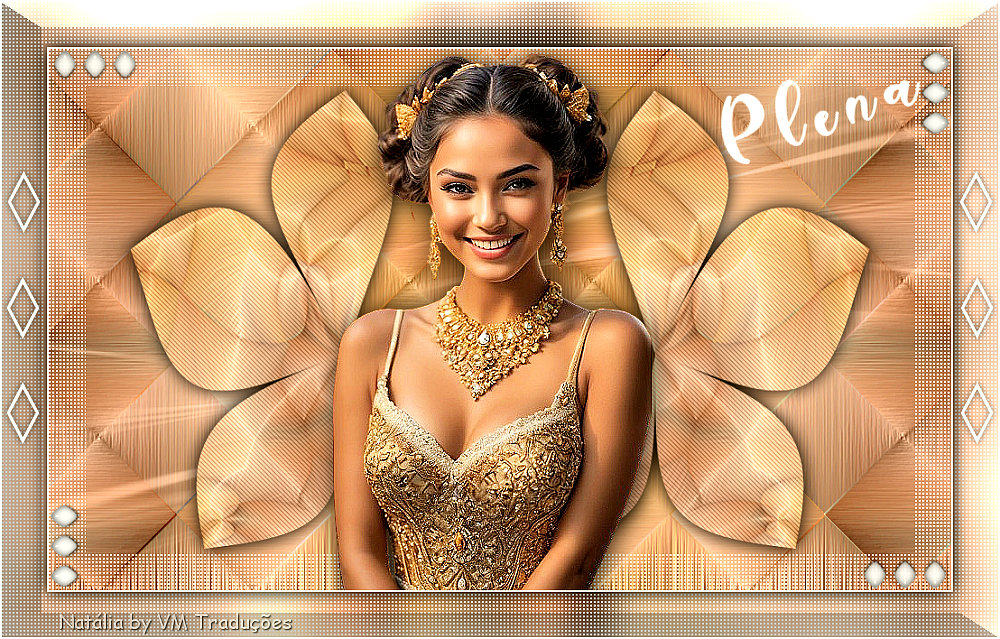
Put your signature
Merge All
Save as JPEG
*
If you make my translation, I will be very happy if:
> You warn me if you find any errors
> Send a copy of your version to my email *
> If when sharing you mention that you used my translation, thus
valuing my work
*My email - veramendespsp2@gmail.com
Tutorial traduzido em 21/05/24
*
 |