|
SCRIPT
01. Open the material / Duplicate (shift +d) / Close the
originals
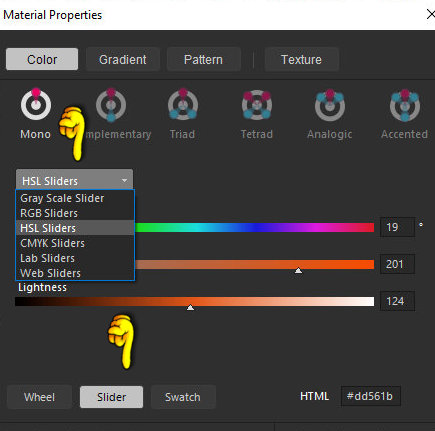
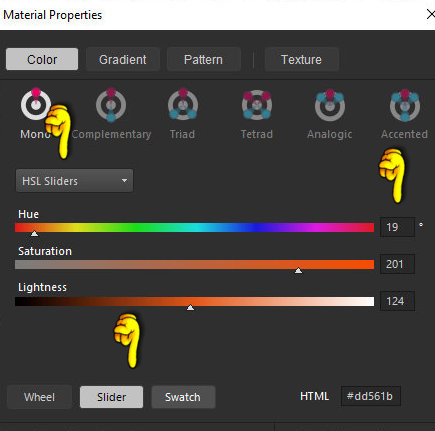
02. Find a color of your tube placed in the foreground. 03. Write down theo H(hue) and S(saturation) this color. N.T.: To find the H e S of a cor, place it on the foreground, click on it, on the windows that opens, click on the Slider, on the RGB Sliders, click on it and select the HSB Sliders option. Write down the values that are in Hue and Saturation
04. Open a new transparent image measuring 1000 x 800px
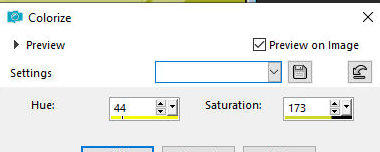
05. Selections / select all 06. Open the image [back] that is in the material 07. Copy and paste into selection 08. Select none 09. Adjust / Hue and Saturation / Colorize use the H and S values that were noted before
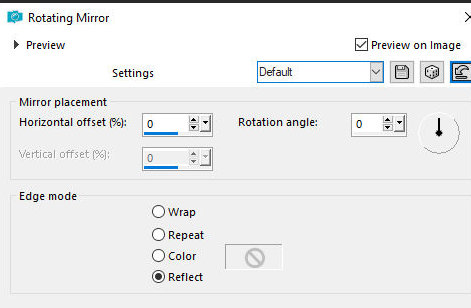
10. Effects / Plugins / Simple / Centre Tile Efects / Reflection Effects / Rotating Mirror
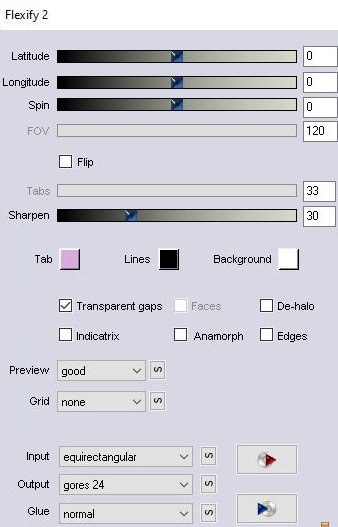
15. Image / Mirror / Mirror Vertical 16. Effects / Plugins / Flaming Pear / flexify 2
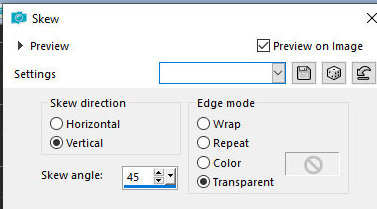
17. Effects / Geometric Effects / Skew
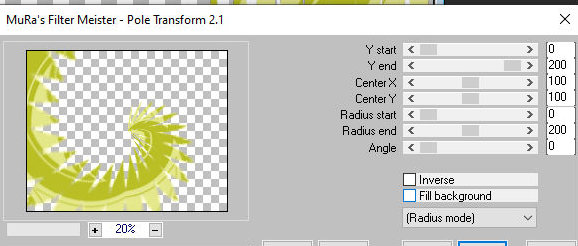
18. Effects / Plugins / Mura's Meister / Pole Transform
19. Layers/Duplicate
20. image / Mirror / Mirror Horizontal 21. Image / Mirror / Mirror Vertical 22. Merge down 23. Effects / Plugins / Mehdi / Natural Grain 2.0 Click on Basic Grain and strength=20
24. Effects / Edge Effects / enhance
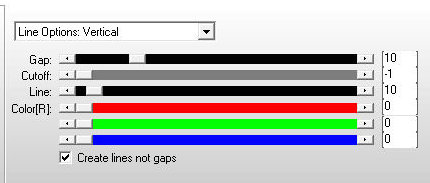
25. Drop shadow: 2 2 50 0 black Repeat with negative V and H 26. Layers / New Raster Layer 27. Layers / Arrange / Send to Bottom 28. Paint with the foreground color 30. Effects / Plugins / AP [Lines] / Silverlining
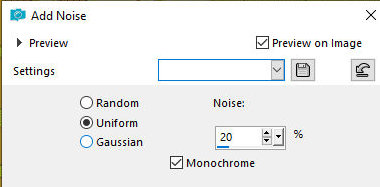
31. Adjust / Add / Remove Noise / Add Noise
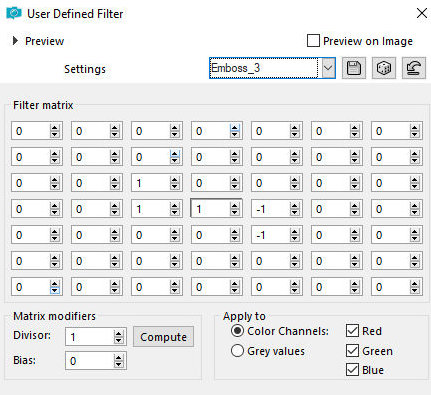
32. Effects / User Defined Filter / emboss 3
33. Activate the top layer
34. Copy the deco tube [deco_tete_056] and paste it as a new layer 35. Colorize if desired 36. Position according to the model 37. Copy the tube character and paste it as a new layer 38. Position according to the model 39. Make other adjustments as you see fit 40. Merge visible 41. Choose a lighter color and put it in the background 42. Prepare a Radial gradient (45/10/center point=50/50 /invert unchecked)
43. Selections / Select All
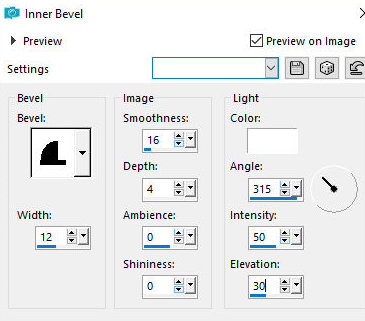
44. Image / Add borders / symmetric marked / 50px / white 45. Selections / Invert 46. Paint the selection with the formed gradient 47. Effects / 3D Effects / Inner Bevel
48. Select none
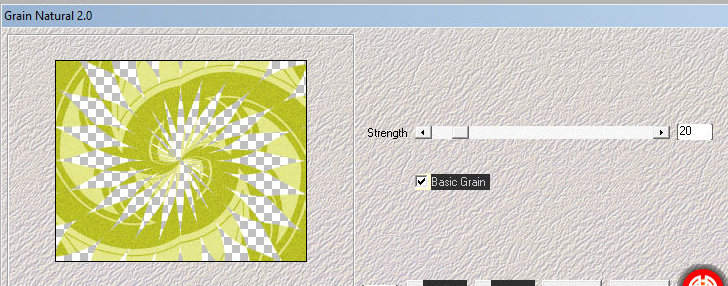
*
Tutorial traduzido em
*
|