|
Tutorial de Natália
Link tutorial original:
Passeio
|
| Tubes Principais:
VM Tubes
|
| Link material:
No Material
You'll need:
> 1 character tube
>1 decorative tube
|
| Plugins: Alf's Power Sines/ 2 Diag
Sin Grads
FFG B/ Button Deluxe
FM Tile Tools/ Blend Emboss
Mura's Meister/ Perspective Tiling
AAA Frames/ Foto Frame
|
SCRIPT
Open material / duplicate (shift+d) / close originals
Choose two from your tube: a dark color for the foreground and a
light color for the background
Note the RGB of the dark color
Open a new transparent image measuring 900 x 600px
Paint with any color
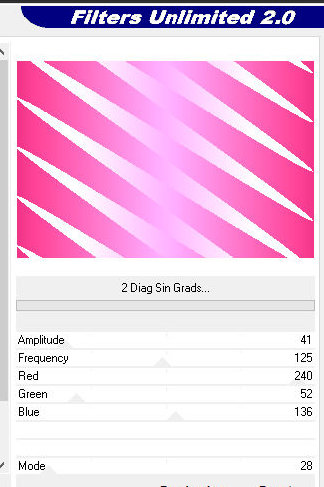
Effects / Plugins / Unlimited 2 / Alf's Power Sines / 2 diag Sin
Grads
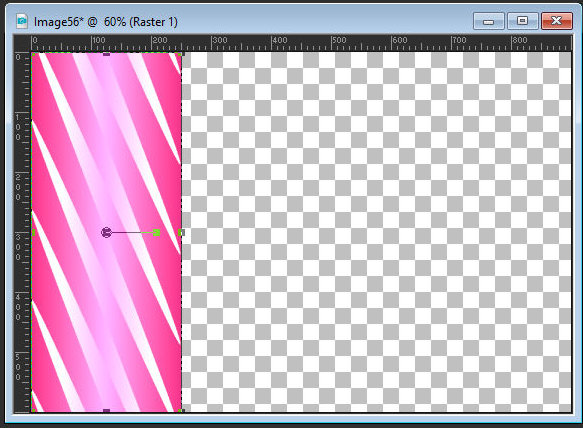
Enable the ruler: View / Rules
Activate the Pick Tool / Click on the central right slider /
Drag to the left to a height of 250px (width) as shown in the
print
Layers/duplicate
Image / Mirror / Mirror horizontal
Merge down
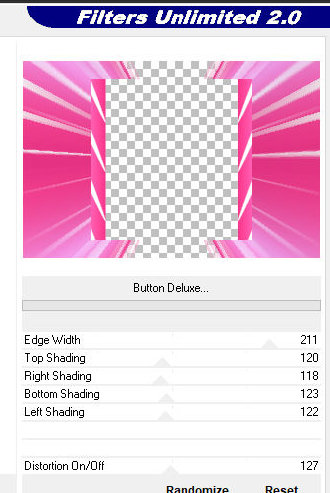
Effects / plugins / unlimited 2 / FF Gallery B / button DeLuxe
Layers/duplicate
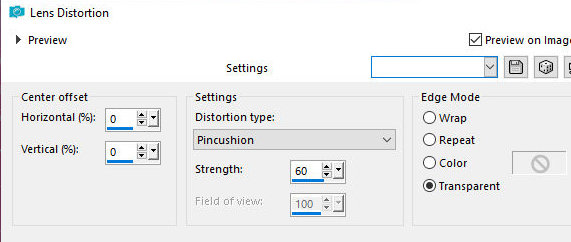
Effects / distortion Effects / Lens distortion
Drop shadow: 5 5 60 10 black
Repeat with negative V and H
Merge down
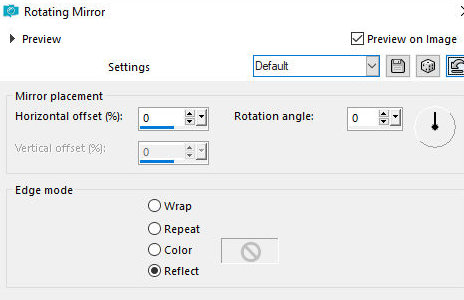
Effects / Reflection Effects / rotating Mirror - Default
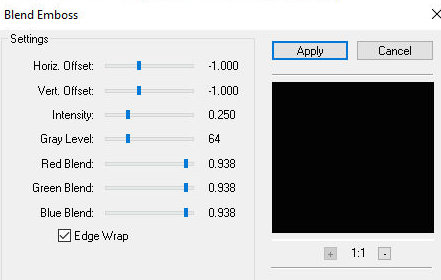
Effects / Plugins / FM Tile tools / blend emboss - Default
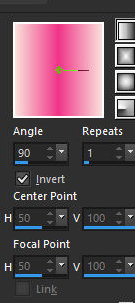
Layers / new Raster Layer
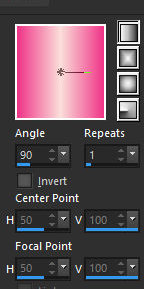
Paint with this Linear gradient (90/1/invert unchecked
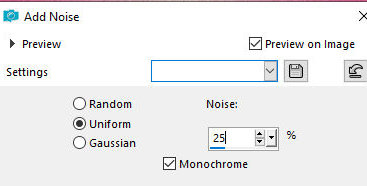
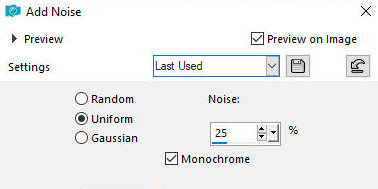
Adjust / Add/Remove Noise / add Noise
Layers / Arrange / Send to bottom
Layers/duplicate
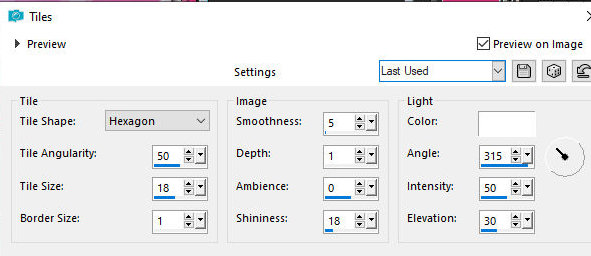
Effects / Texture Effects / Tiles - Preset [Ceramic tiles]
N.T.: As I didn't have this preset, I adjusted the settings.
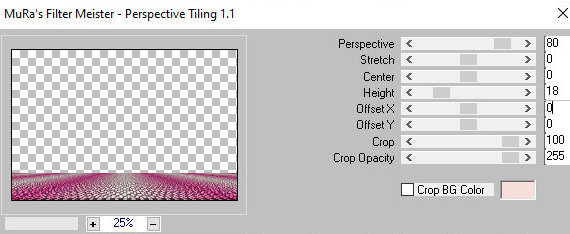
Effects / plugins / Mura's meister / perspective tiling
Select the transparent part with the Magic Wand - tolerance=0 /
Feather=10
Press Delete on your keyboard 5 times
Select none
selections / select All
Image / add borders / symmetric marked /20px / a different color
Selections/Invert
Paint with the same gradient as before
Effects / Texture Effects / Tiles same as above
Select none
Image / add borders / symmetric checked
2px / white
50px / a different color
Select this 50px border with the Magic Wand (T/F=0)
Paint with the same gradient as before, but with invert marked
Adjust / Add/Remove Noise / Add Noise
Selections/Invert
Drop shadow: 5 5 80 10 black
Repeat with negative V and H
Selections/Invert
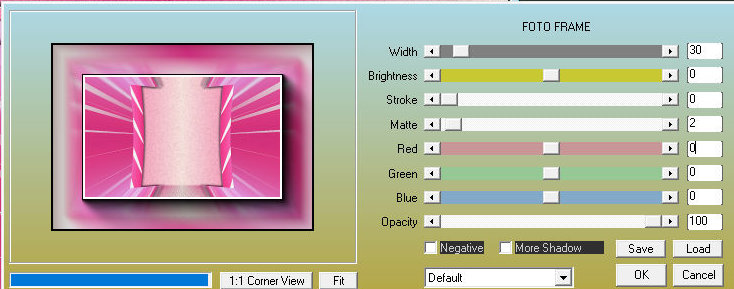
Effects / plugins / AAA Frames/ Foto Frame
Select none
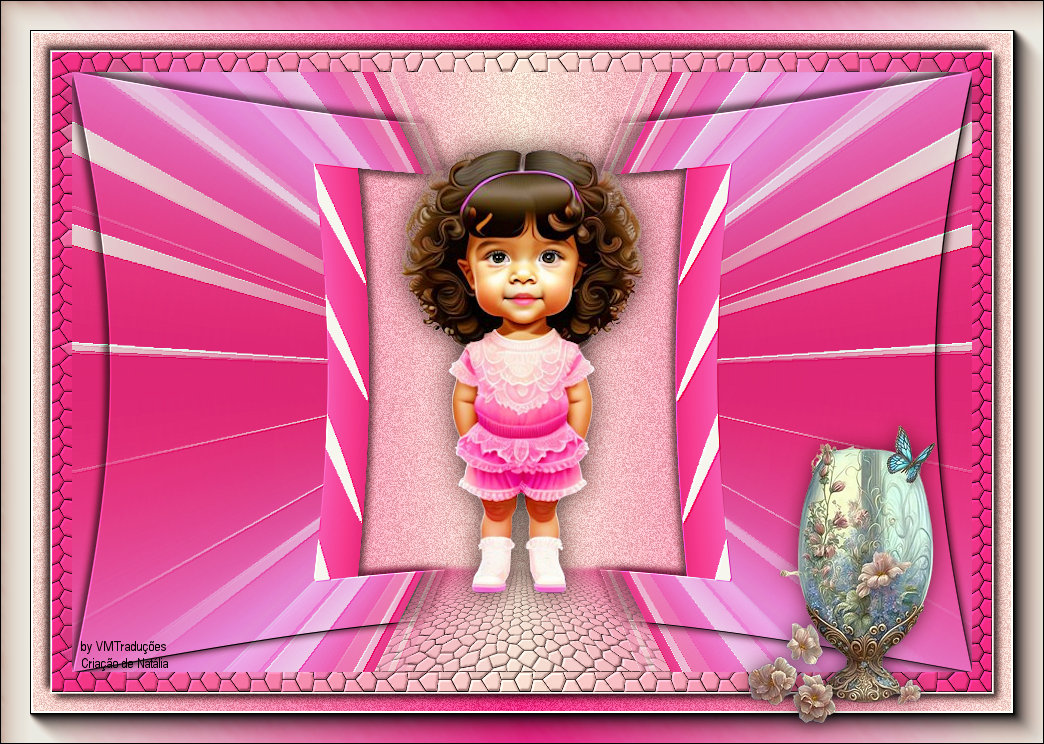
Copy the tube character and paste as a new layer
Drop Shadow of your choice
other adjustments you deem necessary
Copy the decorative tube and paste as a new layer
Drop shadow and other adjustments as you see fit
Merge all
Image / Resize: width=900px - alllayers checked
Adjust / sharpness / sharpen
Put your signature
Save as jpeg
*