|

This tutorial is from Tetê, who I thank for
letting me translate his tutorials.
*
Original tutorial -
here
*
Material:


> Save the selection in the PSP's Selections folder
> you will need 1 tube character
*
Plugins:
Mehdi / Sorting Tiles
Galaxy Plugin/Instant Mirror
SCRIPT
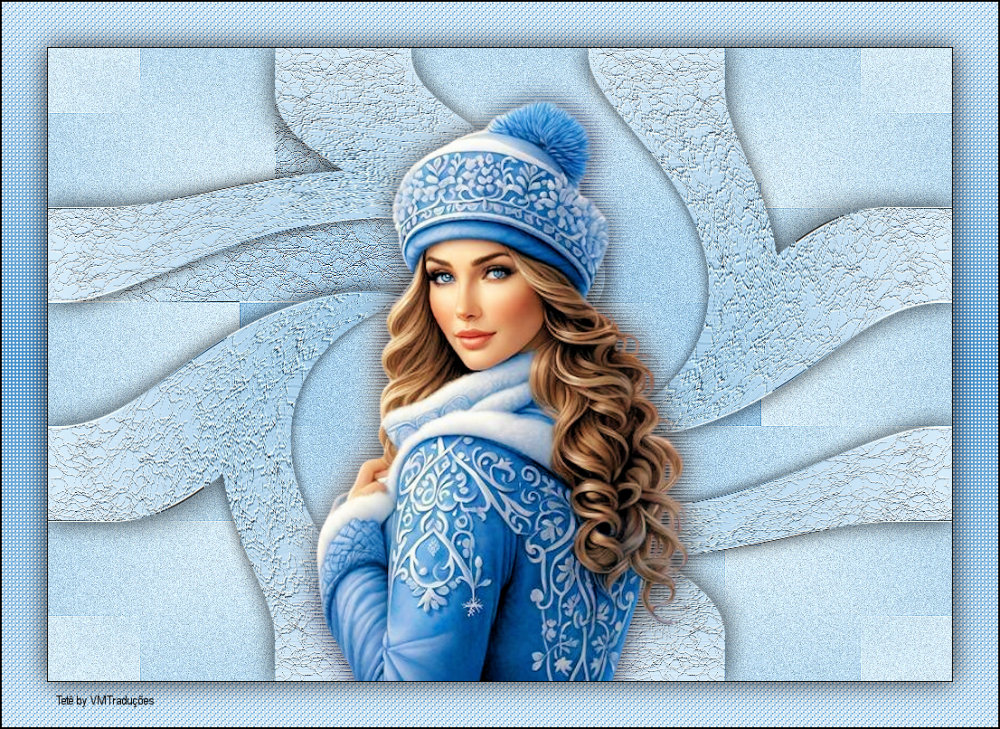
Open material / Duplicate (shift+d) / Close originals
Choose two colors for your tube: a dark one for the foreground and a
light color for the background
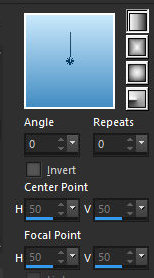
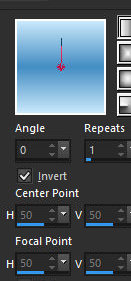
Prepare a Linear gradient (0/0/invert unchecked)
Open a new transparent image measuring 1000 x 700px
Paint the image with the gradient
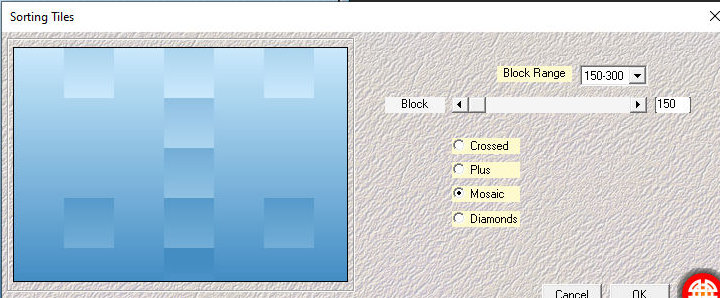
Effects / Plugins / Mehdi / Sorting Tiles
Block Ranging = 150-300 / Block = 150 / Mosaic marked
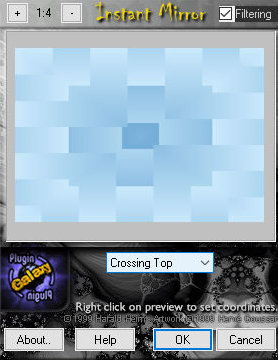
Effects / Plugins / Galaxy Plugin / Instant Mirror / Crossing Top
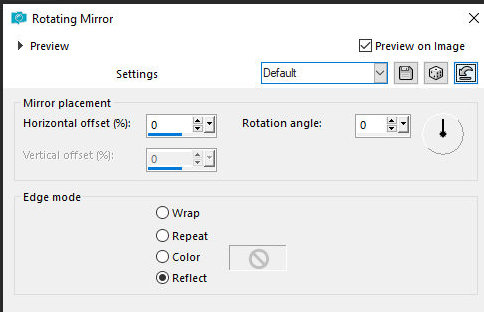
Effects / Reflection / Rotating Mirror - default
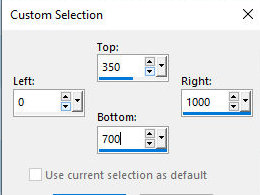
Activate the Selection Tool / Custom Selection configure:
T= 350 / L = 0 / R = 1000 / B = 700
Press Delete on the keyboard
Select None
Layers/Duplicate
Image / Mirror / Mirror Vertical
Merge/Merge Down
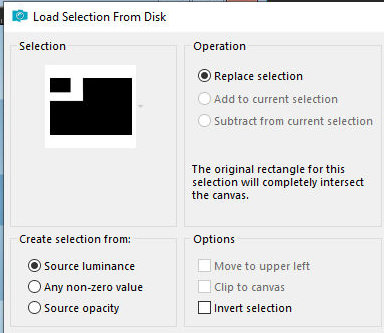
Selections / Load-Save Selection / Load Selection From Disk /
Selection [sel_tete_mito]
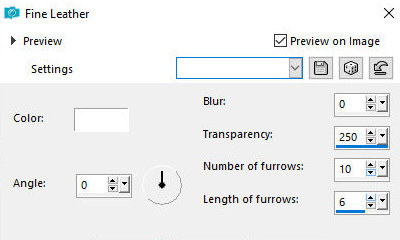
Effects / Texture Effects / Fine Leather
Color #FFFFFF / Angle = 0; Blur = 0 / Transparency = 250 / Number of
furrows = 10; Length = 6
Selections / Promote Selection to Layer
Select None
Layers/Duplicate
Image / Mirror / Mirror Horizontal
Merge/Merge Down
Layers/Duplicate
Image / Mirror / Mirror Vertical
Merge/Merge Down
Drop Shadow: 0 / 0 / 80 / 40 / color: #000000
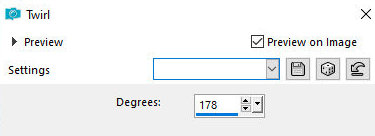
Effects / Distortion Effects / Twirl= 178
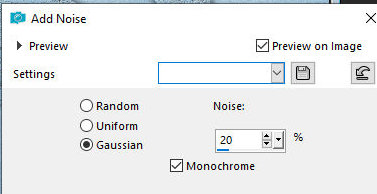
Activate the Raster 1 layer
Adjust/ Add-Remove Noise / Add Noise
Gaussian and Monochrome marked / Noise =20
Adjust/Sharpness/Sharpen
Activate the top layer
Copy the tube character and paste as a new layer
Make any adjustments you deem necessary (resize, drop shadow)
Layers/Duplicate
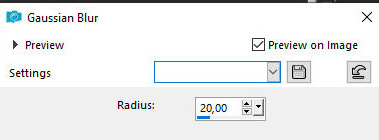
Activate the Layer with the original Tube
Adjust / Blur / Gaussian Blur = 20
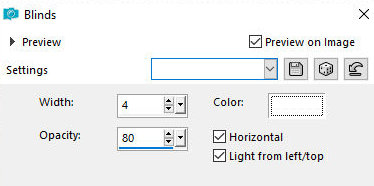
Effects / Texture Effects / Blinds
4 /80 white /horizontal and light from left marked
Effects / Edge Effects / Enhance
Activate the tube copy Layer
Drop shadow of your choice
Image/Add Borders/Symmetric checked/1 px/color #000000
Selections / Select All
Image/Add Borders/Symmetric marked/50 px/color #FFFFFF
Selections/Invert
Paint the selection with this Linear gradient (0/1/invert checked)
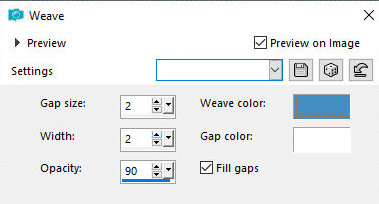
Effects / Texture Effects / Weave in the following configuration:
2 / 2 / 90 / Weave color and Gap color = light Background color or
dark Foreground color (choose the one that looks best in your frame)
Fill gaps marked
Selections/Invert
Drop Shadow: 0 / 0 / 80 / 40 / color: #000000
Selections/Select None
Image/Add Borders/Symmetric marked/2 px/color #000000
Image / Resize = 80% - all layers checked (optional)
Adjust/Sharpness/Sharpen
Put your signature
Merge All
Adjust/Sharpness/Sharpen
Save as jpg
*
|
Value the translator’s work. In
addition to the link to the original work, also include
the translation link. Thank you very much!
Valorar el trabajo del traductor.
Además del enlace a la obra original, incluya también el
enlace a la traducción. ¡Muchas gracias! |
Tutorial traduzido em
05/12/2023
*
 |