|
Tutorial de Natália
Link tutorial original:
Michele
|
| Tubes Principais:
VM Tubes
|
| Link material:
No material
You'll need:
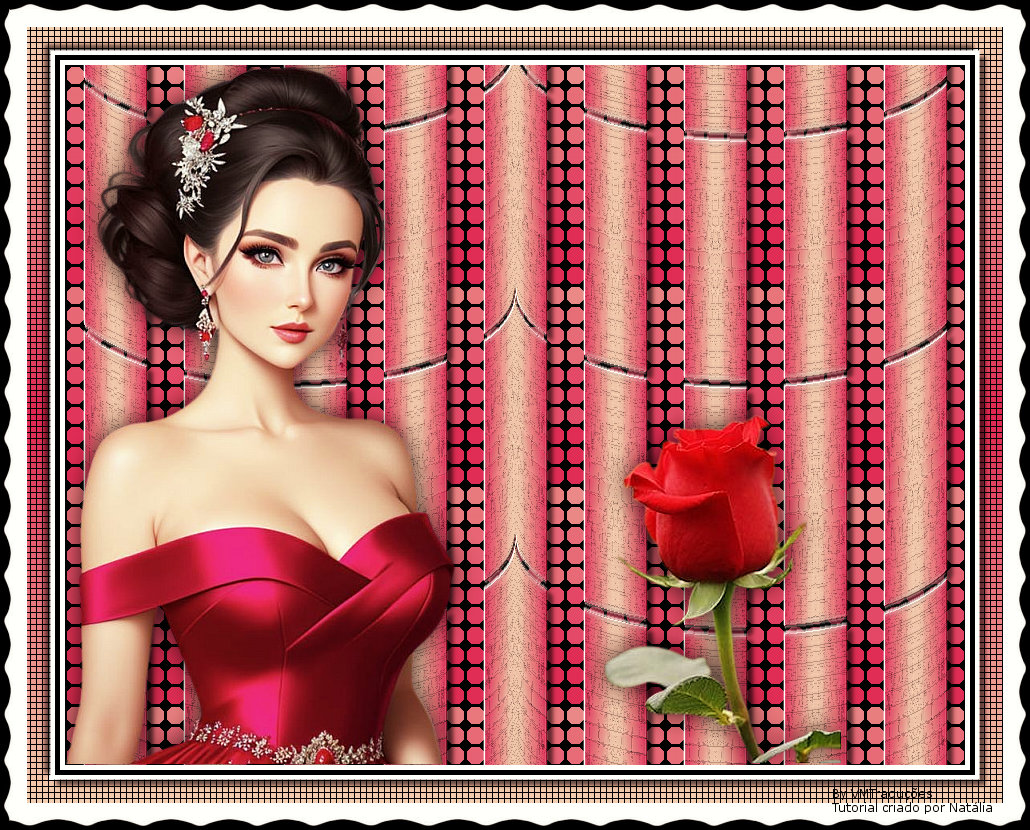
> A character tube
> a decorative tube
|
| Plugins: Phpshares-hdj2 Michele
FFG D: Dimensia/ Diagonal Infini Tiles/ Tri-Tile
Mura's Seamless: Shift at Arch/ Emboss at Alpha
Tronds Filters Brodere I e II
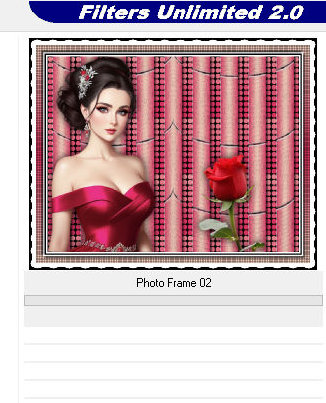
Photo Aging Kit: Photo Frame 02
|
SCRIPT
Open the material / duplicate (shift+d) / Close the originals
Choose two cores of your tube: a dark core for the foreground
and a clear color for the background
Open a new transparent image with 900 x 700px
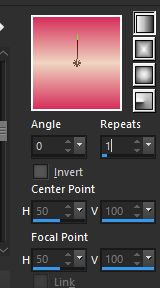
Paint with this Linear gradient (0/1/invert unchecked)
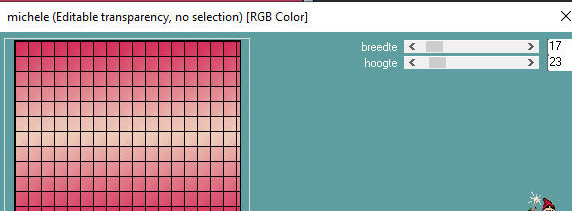
Effects / Plugins / Phpshares-hdj2 / Michele
Layers / duplicate
Image / Resize: 80% - all layers unchecked
Drop shadow: 6 6 60 6 black
Repeat or Drop shadow with negative V and H
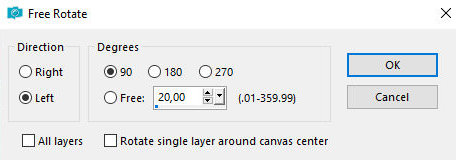
Image / free rotate / Left/90
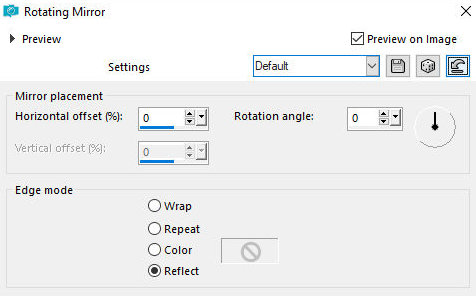
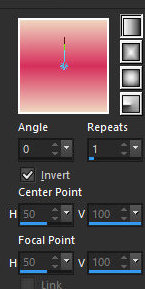
Effects / reflection Effects / Rotating Mirror - Default
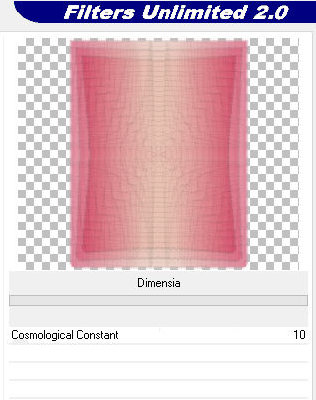
Effects / Plugins /Unlimited 2 / FF Gallery D / Dimensia=10
Adjust / Sharpness / Sharpen More
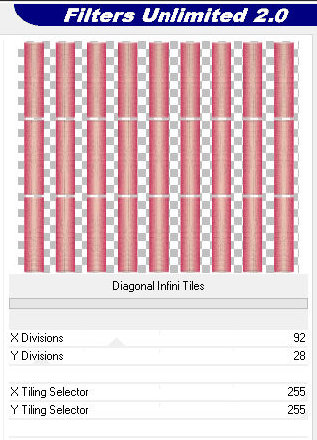
Effects / Plugins / FF Gallery D / Diagonal infini Tiles
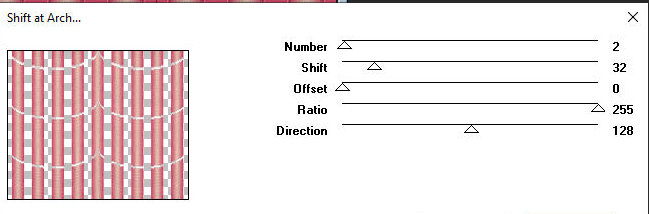
Effects / Plugins / Mura's Seamless / shift at Arch
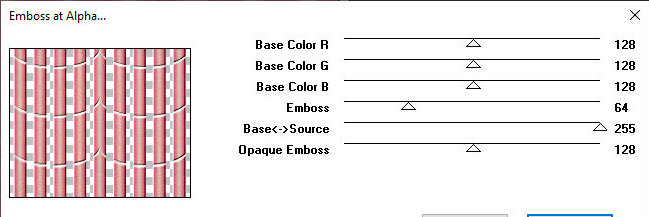
Effects / Plugins / Mura's Seamless / emboss at Alpha - default
Drop shadow: 6 6 60 6 black
Activate a layer raster 1
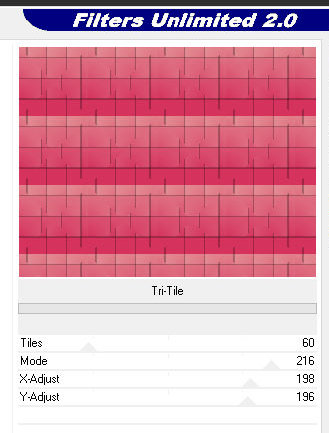
Effects / plugins / FF Gallery D / Tri-Tile
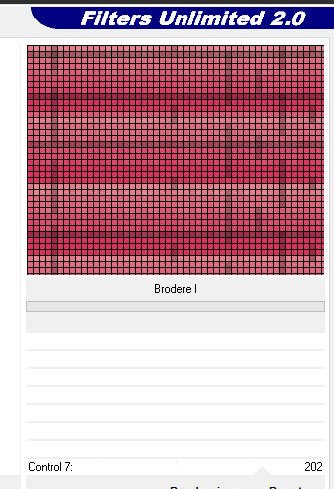
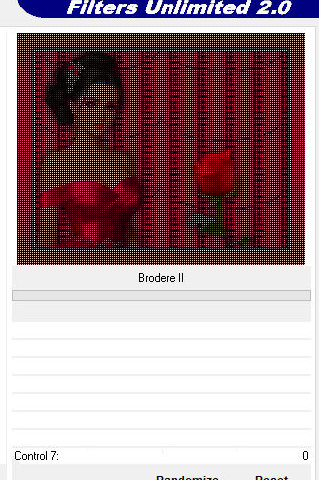
Effects / Plugins / Unlimited 2 / Tronds filters / Brodere 1
Copy or tube character and school as new layer
Layers / Arrange / Bring to top
Resize if necessary
Drop shadow from your school
Copy or tube deco e cole as nova layer
Resize if necessary
Drop shadow from your school
Image / add borders / symmetric markup
5px / white
5px / preto
10px / white
50 px / a different color
Select this border of 50px with a Magic Wand (tolerance/feather=0)
Paint with the previously applied gradient, but with marked
invert
Effects / Plugin / Tronds Filters / Brodere II
Selections / Invert
Drop shadow 6 6 60 6 preto
Repeat with negative V and H
Selections / Invert
Effects / Plugins / Unlimited 2 / Photo Aging Kit / Photo Frame
02
Select none
Image / Resize: width=900px - all layers checked
Adjust / sharpness / sharpen
Place your assignment
Save em jpeg
*