|

Este
tutorial é de Angela das Graças a quem agradeço por me deixar
traduzir seus tutoriais *
Original aqui
* Tubes

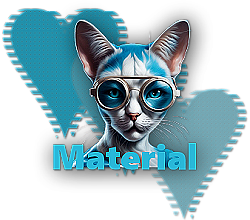
* Material
*
Plugins
Simples / Diamonds
Simples / Pizza Slice Mirror
Texturizer
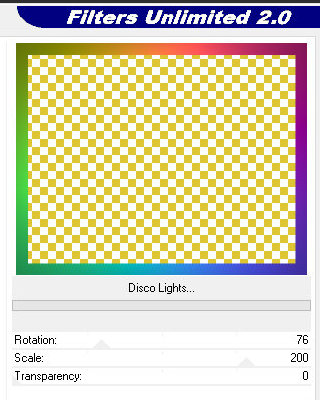
UnPlugged Effects / Disco Light
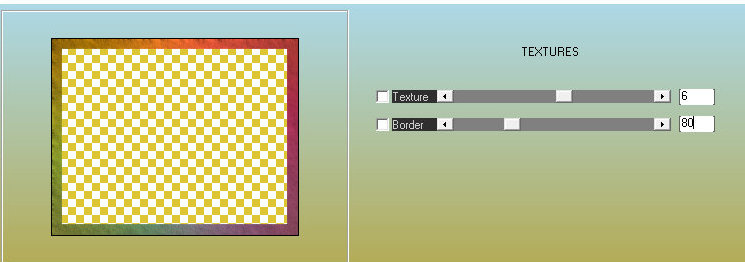
AAAFilter / Textures
ROTEIRO
1. Open the material in PSP / Duplique (Shift+D) /
Close the Originals
2. Open the masks and minimize
3. Open a new transparent image with 900 x 700px
4. Selections / Select all
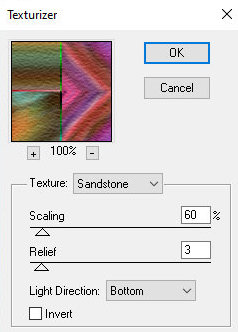
5. Copy the image [Vector-Background-Back-the-Color] and paste into
selection
6. Select none
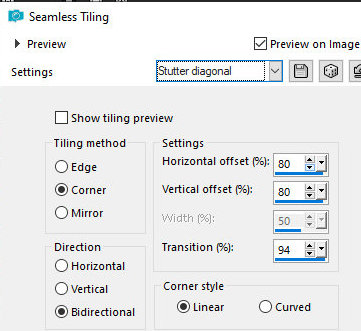
7. Effects / Image Effects / Seamless Tiling - Preset [Diagonal
Stutter]
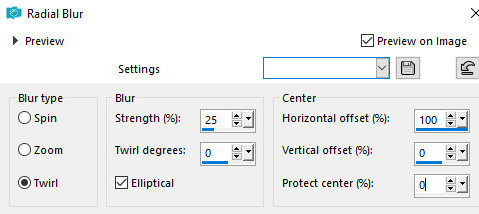
8. Adjust / Blur / Radial Blur
9. Layers / Duplicate
10. Image / Mirror / Horizontal Mirror
11. Layers / Properties / Blend Mode: Multiply
12.Merge Down
13.Adiction Nova Layer
14.Pinte with a color of your tube
15.Layers / Properties / Opatity: 30%
16.Merge Down
17.Effects / Plugins / Simple / Diamond
18.Effects / Plugins / Simple / Slice Pizza Mirror
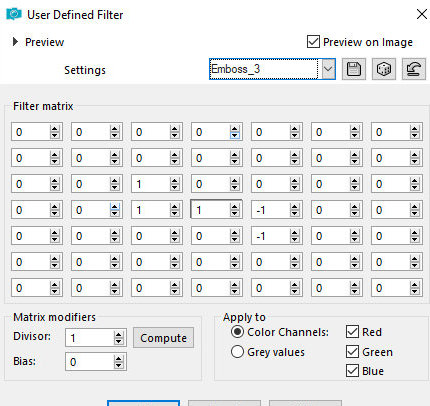
19. Effects / User Defined Filter / Emboss 3
20. Effects / Plugins / Texture /
Texturizer
21. Layers / Duplicate
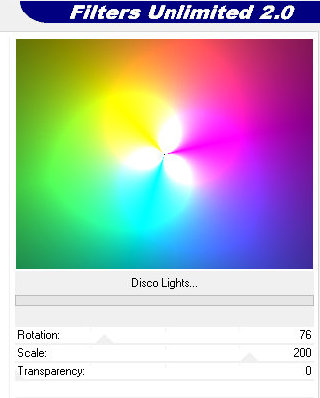
22.Effects / Plugins / Unlimited 2 / Unplugged Effects / Disco
Lights
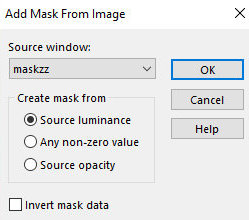
23.Layers / New Mask Layer / From
Image / Mask [MASKZZ]
24. Merge Group
25. Color this layer with the color chosen in item 14 / if you
prefer to change the blend mode
26. Drop Shadow: 4 4 60 4 Black
27. Repeat Drop Shadow with negative V and H
28. Layers / Duplicate
29. Image / Mirror / Vertical Mirror
30. Merge Down
31. Add Nova Layer
32. Paint with white color
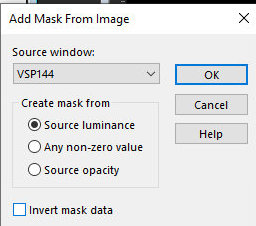
33. Layers / New Mask Layer / From Image / Mask [VSP144]
34. Merge Group
35. Layers / Properties / Blend Mode: Overlay or another of your
choice
36. Copy the character tube and paste it like a new layer
37. Resize if necessary
38. Drop Shadow of your choice
39. Layers / arrange / move down
40. Image / add borders / symmetric marked / 2px / a work color
41. Copie (Edit/Copy-will be in Memory)
42. Image / add borders / symmetric marked / 40px / white
43. Select this 40px edge with Magic Wand
44. Add Nova Layer
45. Paste in the selection the image that is in memory
46. Effects / Plugins / UnplugGed Effects / Disco Lights - equal to
the previous one or change the setting as you prefer
47. Add Nova Layer
48. Paint with the color chosen in item 14
49. Layers / Properties / Opacity: Between 40 and 50%
50. Merge Down (optional)
51. Effects / Plugins / AAA Filters / Textures
52. Selections / Invert
53. Drop Shadow: 0 20 60 30 Black
54. Select none
55. Image / Add Borders / Symmetric Marked / 2px / a color of your
work that was chosen earlier.
56. Put your signature
57. Merge all
58. Save as JPEG
* If you do my translation, I will be very happy if:
> You let me know if you find any errors
> Send a copy of your version to my email *
>If when sharing you mention that you used my translation, thus
valuing my work
*MY EMAIL -
veramendespsp2@gmail.com Tutorial traduzido em
27/03/2024
*
 |