|

This tutorial is by Silvana Gomes who I thank for
letting me translate her tutorials
*
Original tutorial here
*
Tubes:

*
Material

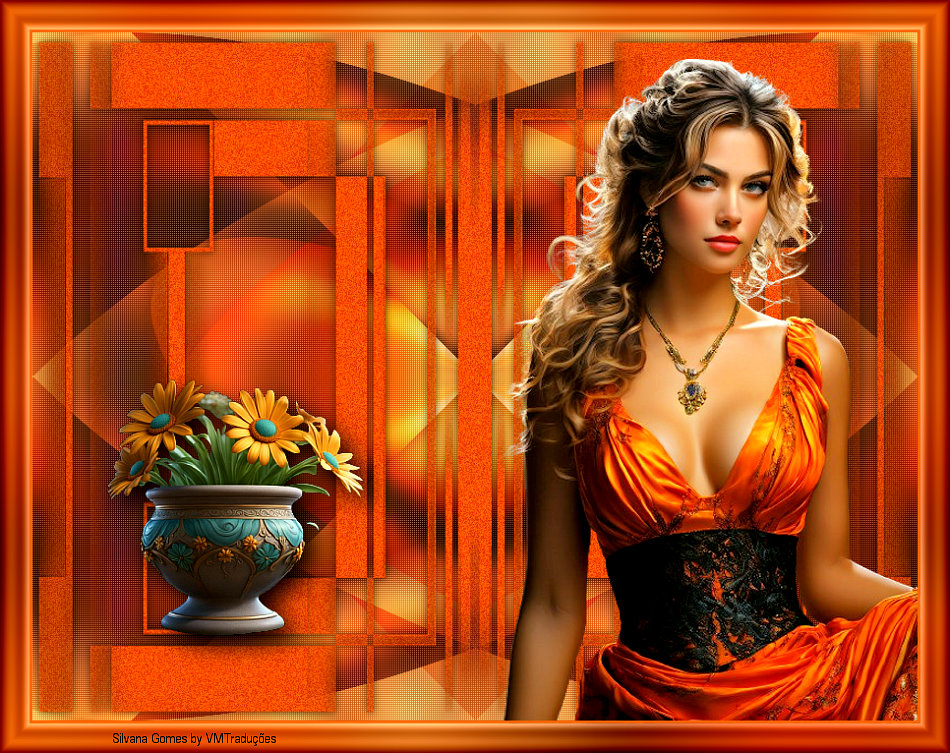
> You will have a character tube and a decorative tube (optional)
*
Plugins
penta.com/color dot
Adjust/Variations
Unlimited 2.0 / Buttons & Frames / Glass Frame 2
SCRIPT
Open the material on PSP / Duplicate (shift+d) / Close the originals
Open the mask [sg_art-deco1] and minimize
Place the preset [Preset_SeamlessTiling_Wings Back] in the Presets
folder on the PSP
Choose two colors for your tube: a dark one for the foreground and a
light one for the background
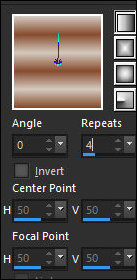
Prepare a Linear gradient
Open a new transparent image measuring 900 x 700px
Paint the image with the gradient
Selections / Select All
Copy the tube character and paste it into the selection
Select none
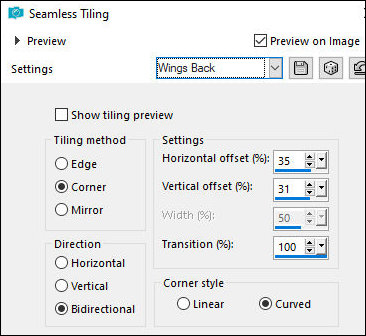
Effects / Image Effects / Seamless Tiling - Preset [Wings back (on
the material)] or as per the print / Apply twice
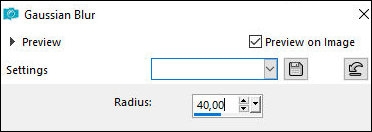
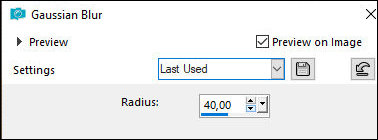
Adjust/Blur/Gaussian Blur: 40
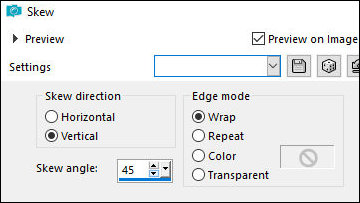
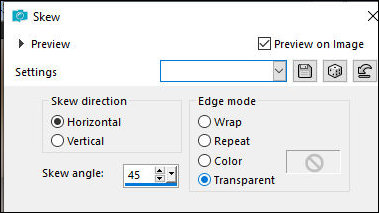
Effects / Geometric Effects / Skew
Layers/Duplicate
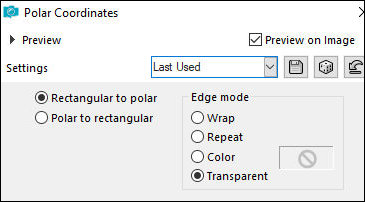
Effects / Distortion Effects / Polar Coordinates / Rectangular to
Polar / Transparent
Effects / Geometric Effects / Skew
Merge down
Effects / Reflection Effects / Rotating Mirror - Default

Layers/Duplicate
Image / Mirror / Mirror Vertical
Layers / Properties / Blend mode: Overlay
Merge down
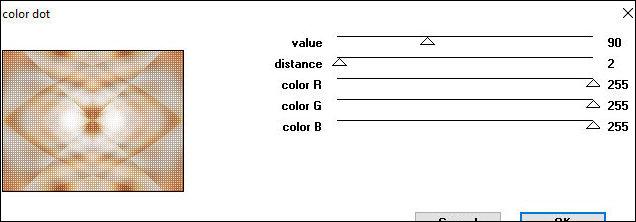
Effects / Plugins / Penta.com / Color Dot
Add new layer
Paint the layer with dark color
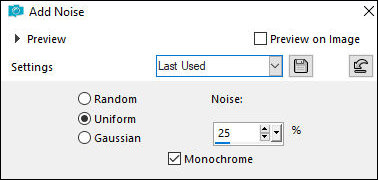
Adjust / Add/Remove Noise / Add Noise
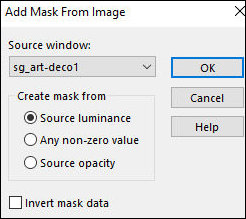
Layers / New Mask Layer / From Image / Mask [sg_art-deco1]
Merge Group
Drop shadow: 0 0 75 12 black
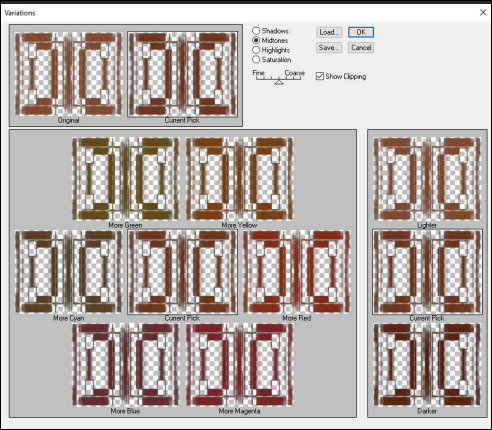
Effects / Plugins / Adjust / Variation / Click Original / click
Darker
Copy the tube character and paste as a new layer
Resize if necessary and apply a Drop Shadow of your choice
Position as you see fit
Image/Add Borders/Symmetric marked/3px/dark color
Copy and paste as new image / set aside
Image/Add Borders/Symmetric marked/30px/light color
Select this edge with the Magic Wand (tolerance/Feather=0)
Copy the reserved image and paste it into the selection
Adjust / blur / Gaussian Blur=40
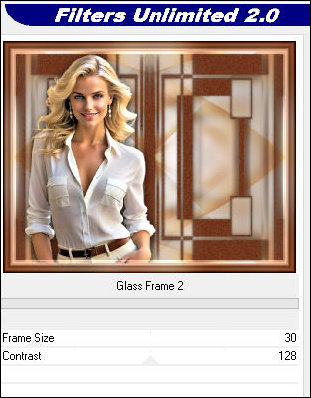
Effects / Plugins / Unlimited 2 / Buttons & Frames / Glass Frame 2
Select none
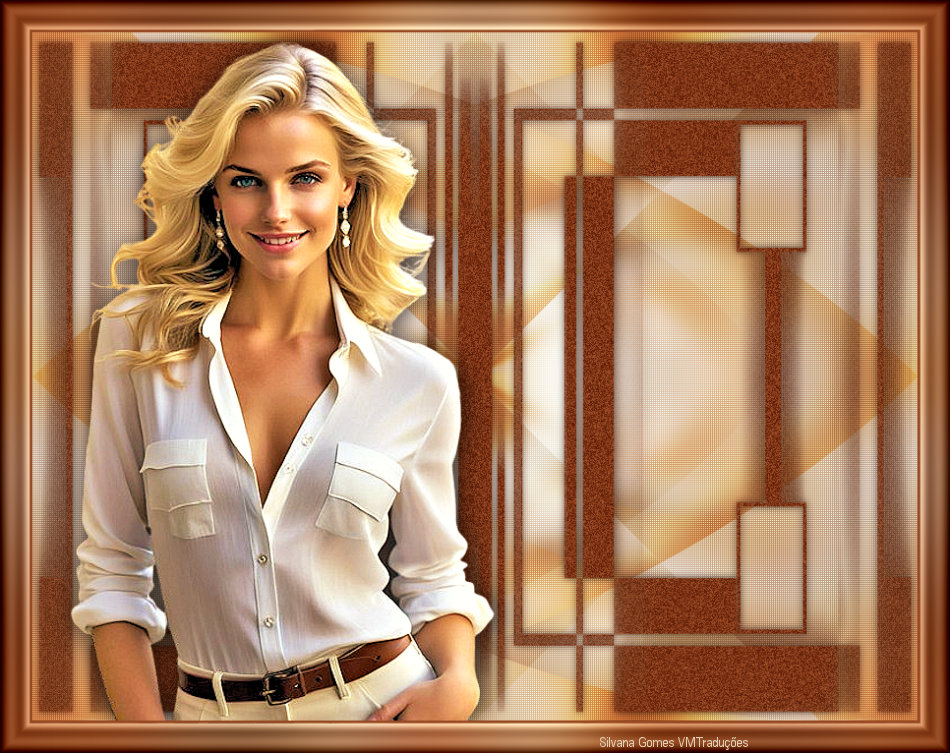
Put your signature
Merge All
Save as jpeg
*
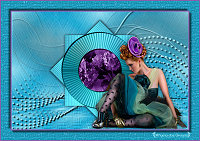
Another model
If you do my translation, I will be very happy if:
> You inform me if you find any errors.
> Send a copy of your version to my email*
> If you share, mention that you used my translation, thus valuing
my work.
* EMAIL: veramendespsp2@gmail.com
* Tutorial traduzido em
24/02/24
*
 |