|
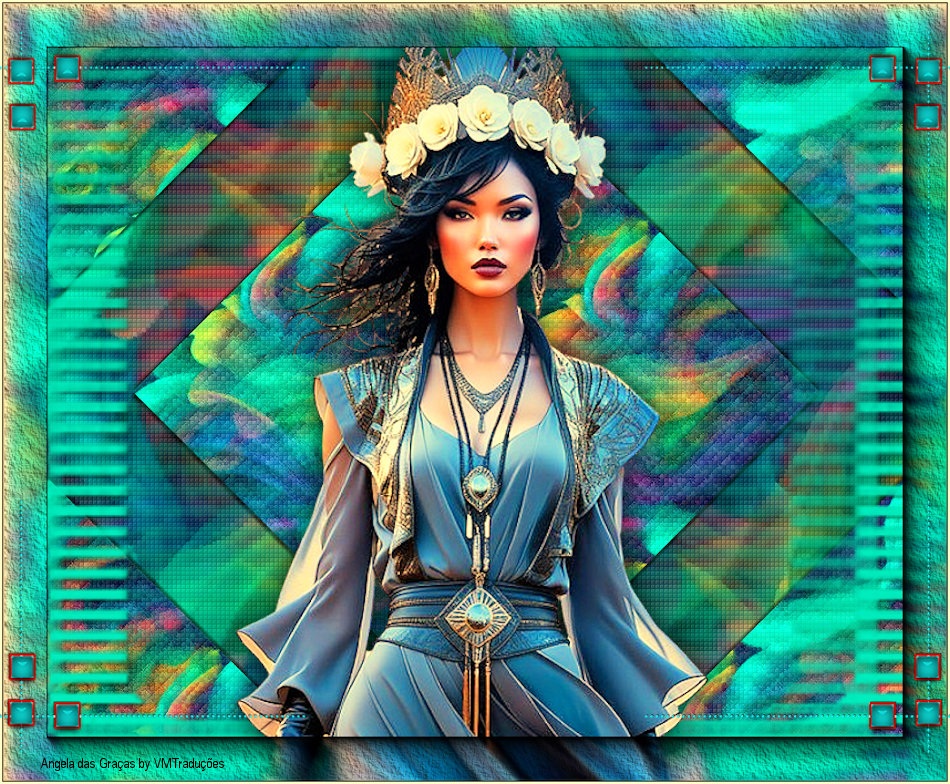

This tutorial is by Angela das Graças, who I thank
for letting me translate her tutorials.
*
Original -
Here
*
Material

>Save the Seamless_tiling preset in the Presets folder on the PSP
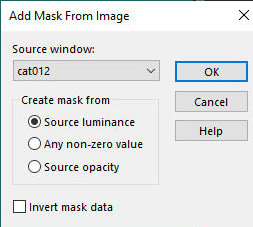
>Open the Cat012 mask and minimize
> You will need 1 tube character
*
Plugins:
Nik Software/Color Efex
Xero / Fritillary
Simple / Diamonds
AAAFrames/Texture Frame
SCRIPT
01. Open the material on psp / Duplicate (shift+d) / Close the
originals
02. Open a new transparent image measuring 850 x 700px
03. Selections / Select All
04. Copy the .jpg image (in the material) and paste it into the
selection
05. Select none
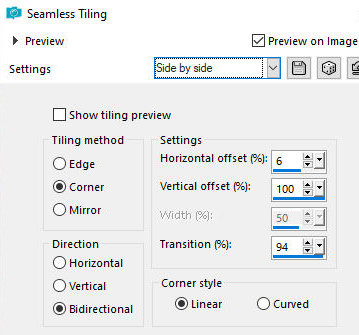
06. Effects / Image Effects / Seamless Tiling - preset[side y side]
(in the material or configure according to the print)
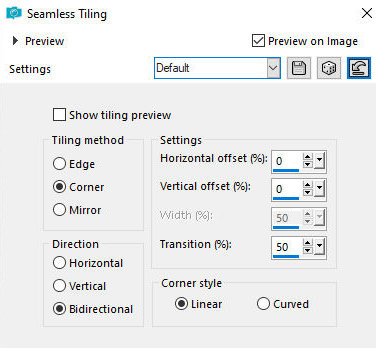
07. Effects / Image effects / Seamless Tiling - Default
08. Effects / Plugins / Nik Software / Color Effex Pro / Bi-Color
User Defined
Note: you can use two colors that match the tube or choose the
predominant color of the tube and put it in both options

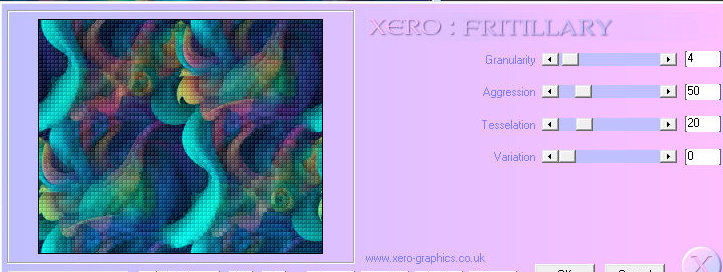
09. Effects / Plugins / Xero / Fritillary
10. Layers/Duplicate
11. Image / Resize: 80% - all layers unchecked
12. Drop Shadow: 4 4 60 4 black
13. Repeat Drop shadow with negative V and H
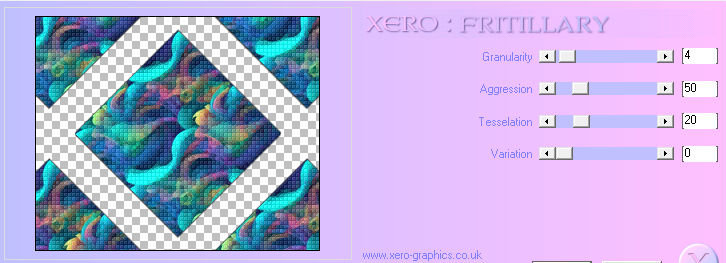
14. Effects / Plugins / Simple / diamonds
15. Merge visible
16. Effects / Plugins / Xero / Fritillary
17. Layers / New Raster Layer
18. Paint with one of the colors chosen in item 08
19. Layers / New Mask Layer / From Image / Mask [Cat012]
20. Merge Group
21. Drop Shadow: 2 2 60 2 black
22. Copy the tube character and paste it as a new layer
23. Drop Shadow of your choice
24. Position as you see fit
25. Image; Add borders / symmetric marked / 2px / white
26. Effects / Plugins / AAA Frames / Photo Frame
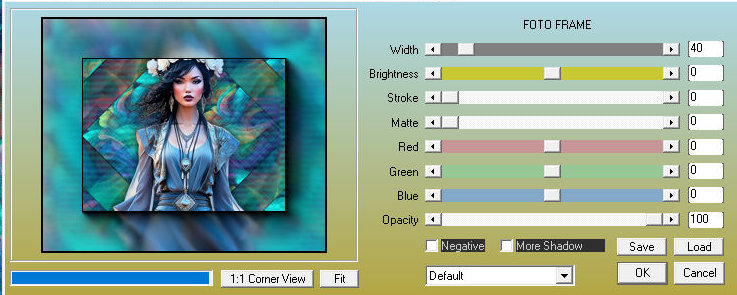
27. Effects / Plugins / AAA Frames / Texture Frame
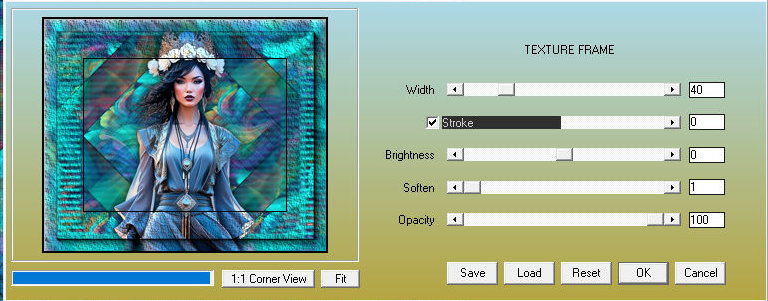
28. Image / Add borders / symmetric marked / 2px / white
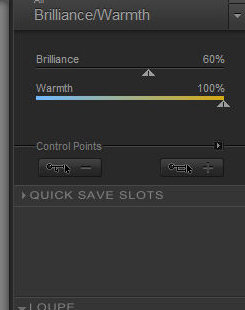
29. Effects / Plugins / Nik software / Color Effex Pro / Brilliance/Warmth
Note: you can change the settings if you want the colors to be more
or less intense.
The author used the print setting in the main tag and in another
model she used 60/100
30. Copy the tube deco and paste it as a new layer
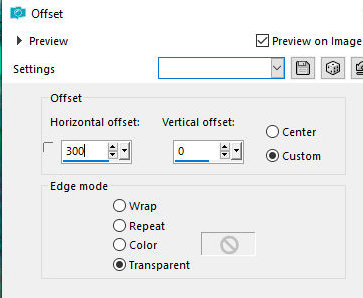
31. Effects / Image Effects / Offset: 300/0/transparent
32. Layers/Duplicate
33. Image / Mirror / Mirror Horizontal
34. Merge down
35. Colorize according to your work
36. Merge all
37. Put your signature
Merge All
Save as jpeg
|
Value the translator’s work. In
addition to the link to the original work, also include
the translation link. Thank you very much!
Valorar el trabajo del traductor.
Además del enlace a la obra original, incluya también el
enlace a la traducción. ¡Muchas gracias! |
Tutorial traduzido em
*
 |