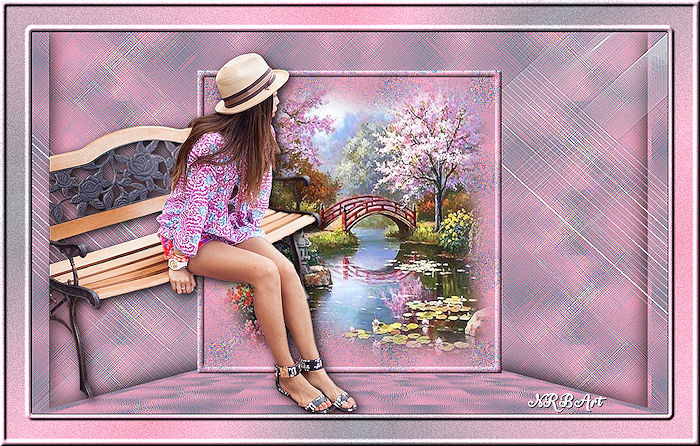
(Proposta da Aracelli)
Material:
Tube de personagem
Misted de paisagem
mask creation.tine_masque334
Selection_woodland
Plugin Contours/ Croisillons
Plugin Contours/ Effet Pointilliste
Plugin Contours/ Noir/ Blanc
Roteiro:
1 - Abra os materiais
no PSP/ Escolha duas cores
Coloque a cor mais escura no foreground e a mais clara
no background
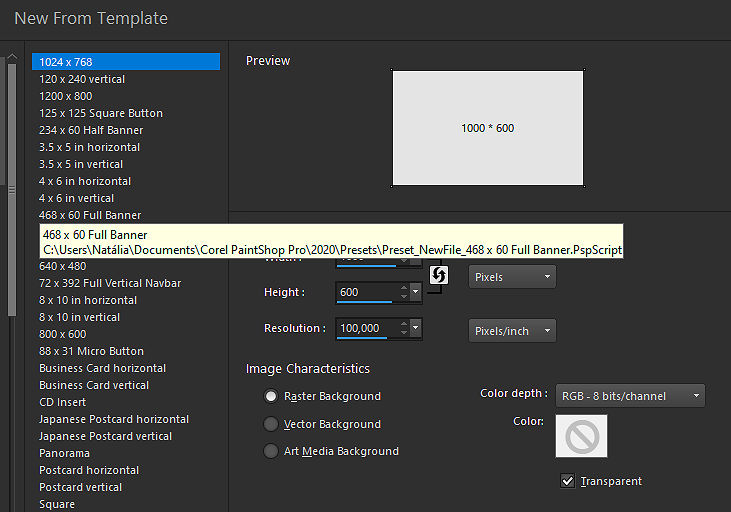
2 - Abra uma imagem
transparente 1000X600
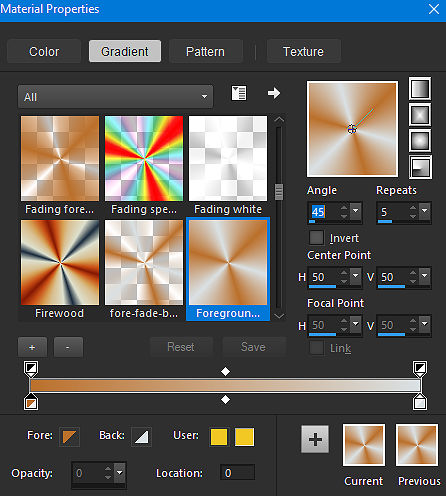
3 - Pinte a
imagem com um gradiente radial/ 45/ 5/ Center Point/ 50/ 50
Invert desmarcado
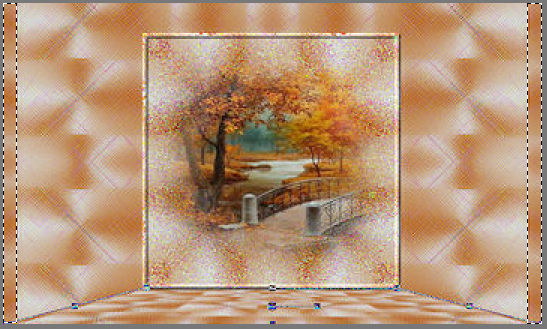
4 - Effects/ Edge
Effects/ Enhance More
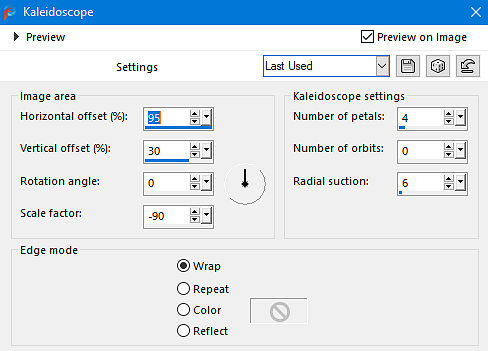
Effects/ Reflections Effects/ kaleidoscope/ como no
print
5 - Effects/ Edge
Effects/ Enhance
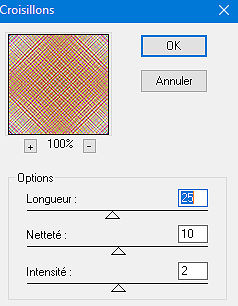
Effects/ Plugins/ Contours/ Croisillons/ 25/ 10/ 2
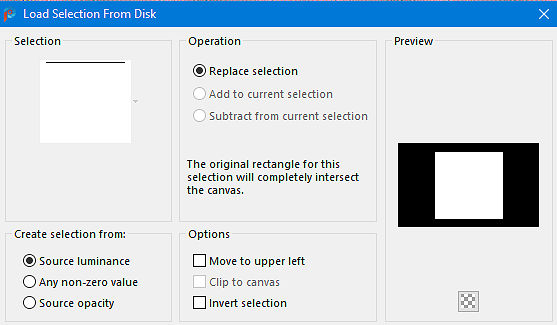
6 - Selection/ Load
Save Selection/ Load Selection from Disk
Escolha a seleção selection_woodland
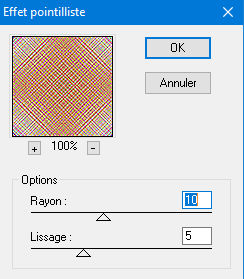
7 - Selections/
Promote Selection to Layer
Effects/ Plugins/ Contours/ Effet Pointilliste/ 10/ 5
8 - Edit/ Copy no
misted paisagem
Edit/ Paste/ Into Selection
9 - Selections/
Modify/ Select Selection Borders/ 10/ Inside e Anti-alias
marcado
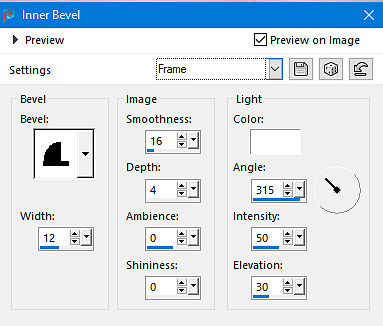
10 - Effects/ 3D
Effects/ Inner Bevel/ Settings/ Frame
Selections/ Select None
11 - Duplique a
Raster 1
Use a ferramenta Pix configurada no Mode Free e mexa
os nós até obter a imagem, conforme o modelo
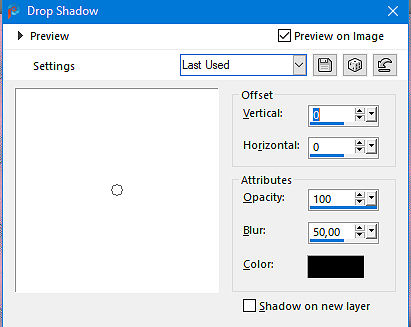
12 - Effects/ 3D
Effects/ Drop Shadow/ 0/ 0/ 100/ 50
13 - Na Raster 1,
selecionar as bordas laterais, com a Selection Tool
configurada em Rectangle/ Add (Shift)
14 - Selections/
Promote Selection to Layer
Selections/ Select None
15 - Effects/ 3D
Effects/ Drop Shadow (item 12)
16 - Layers/ New
Raster Layer
Pinte com uma cor a sua escolha para a mask
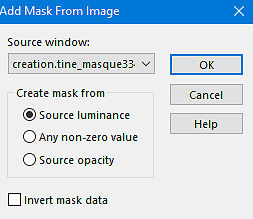
17 - Aplique a mask
creation.tine_masque334
Layers/ Delete/ Layers/ Merge/ Merge Group
18 - Effects/ Edge
Effects/ Enhance
Edit/ Copy no tube
19 - Edit/ Paste as
New Layer
Layers/ Arrange Bring to Top
20 - Image/ Resize,
se necessário
Posicione e aplique uma sombra a gosto
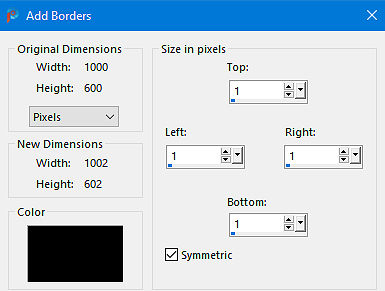
21 - Image/ Add
Border/ Symmetric marcado/ 1/ preto
22 - Selections/
Select All
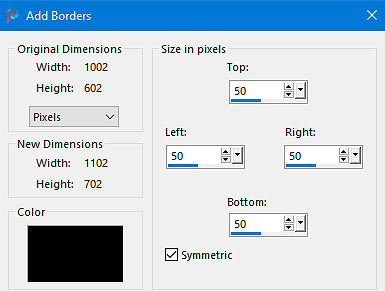
Image/ Add Borders/ 50/ qualquer cor
23 - Selections/
Invert
Pintar com o mesmo gradiente do item 2
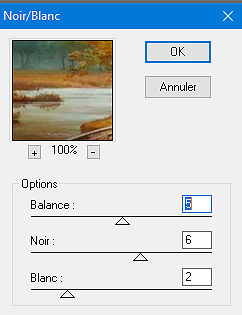
24 - Effects/ Plugins/
Contours/ Noir/ Blanc/ 5/ 6/ 2
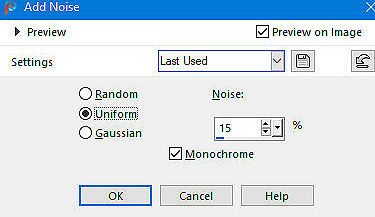
25 - Adjust/ Add
Remove Noise/ Add Noise/ Uniform/ 15/ Monochrome marcado
26 - Effects/ 3D
Effects/ Inner Bevel/ Settings/ Frame (item 10)
Selections/ Select None
27 - Image/ Resize/
By Pixels marcado/ Width/ 1000
Resize All Layers marcado
28- Assine e Salve em
Jpeg
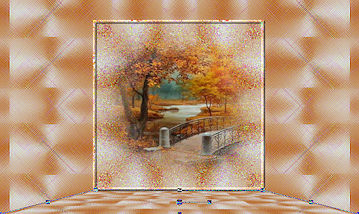
Outro Modelo:
Créditos:
Tutorial: Natália Raposo
Tube1: Calligraphy
Tube2: Franie Margot
Mask: creation.tine_masque334